Application note AN-13 · U13ABSTRACT
Macropad
Product status
- Idea
- Design
- Build
- Shipped
- In use
A small programmable keyboard I made for Hack Club's macropad program. It runs on a Seeed XIAO RP2040 with KMK, a Python-based keyboard firmware, and has an OLED and RGB LEDs.
1From the README
A custom macro pad featuring 16 mechanical switches, OLED display, and RGB LEDs. Built with the Seeed XIAO RP2040 microcontroller and KMK firmware for a compact, programmable keyboard solution.
Features
- 4 Cherry MX Switches: Tactile mechanical switches for responsive key presses
- 0.96" OLED Display: SH1106 I2C display for status or custom graphics
- RGB LED Matrix: WS2812B LEDs for visual feedback
- Compact Design: Fits within 200x200x100mm enclosure
- KMK Firmware: Python-based firmware for easy customization
Images
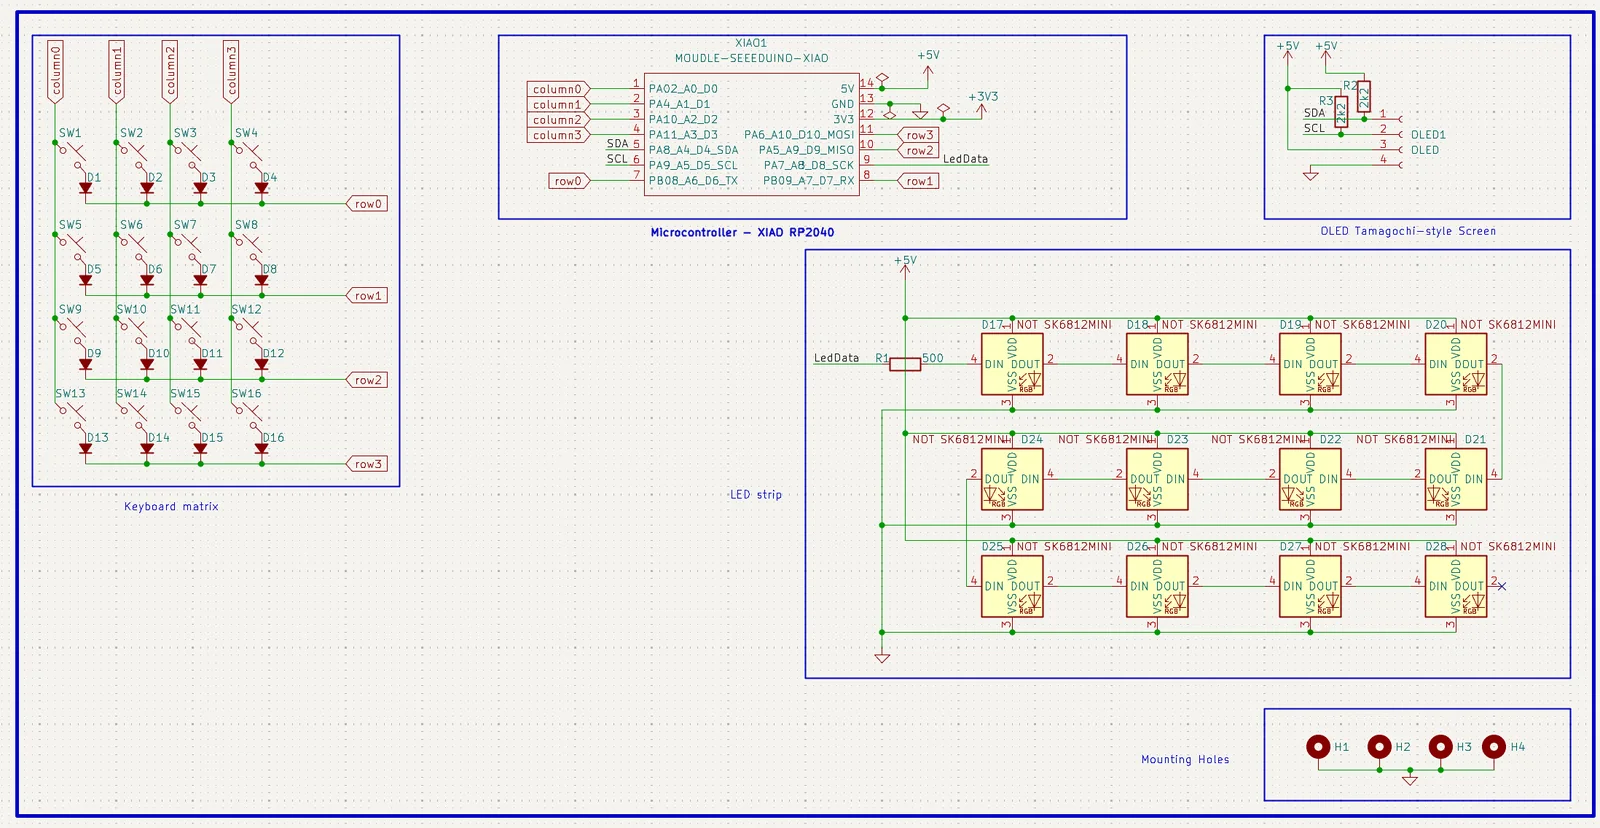
Schematic
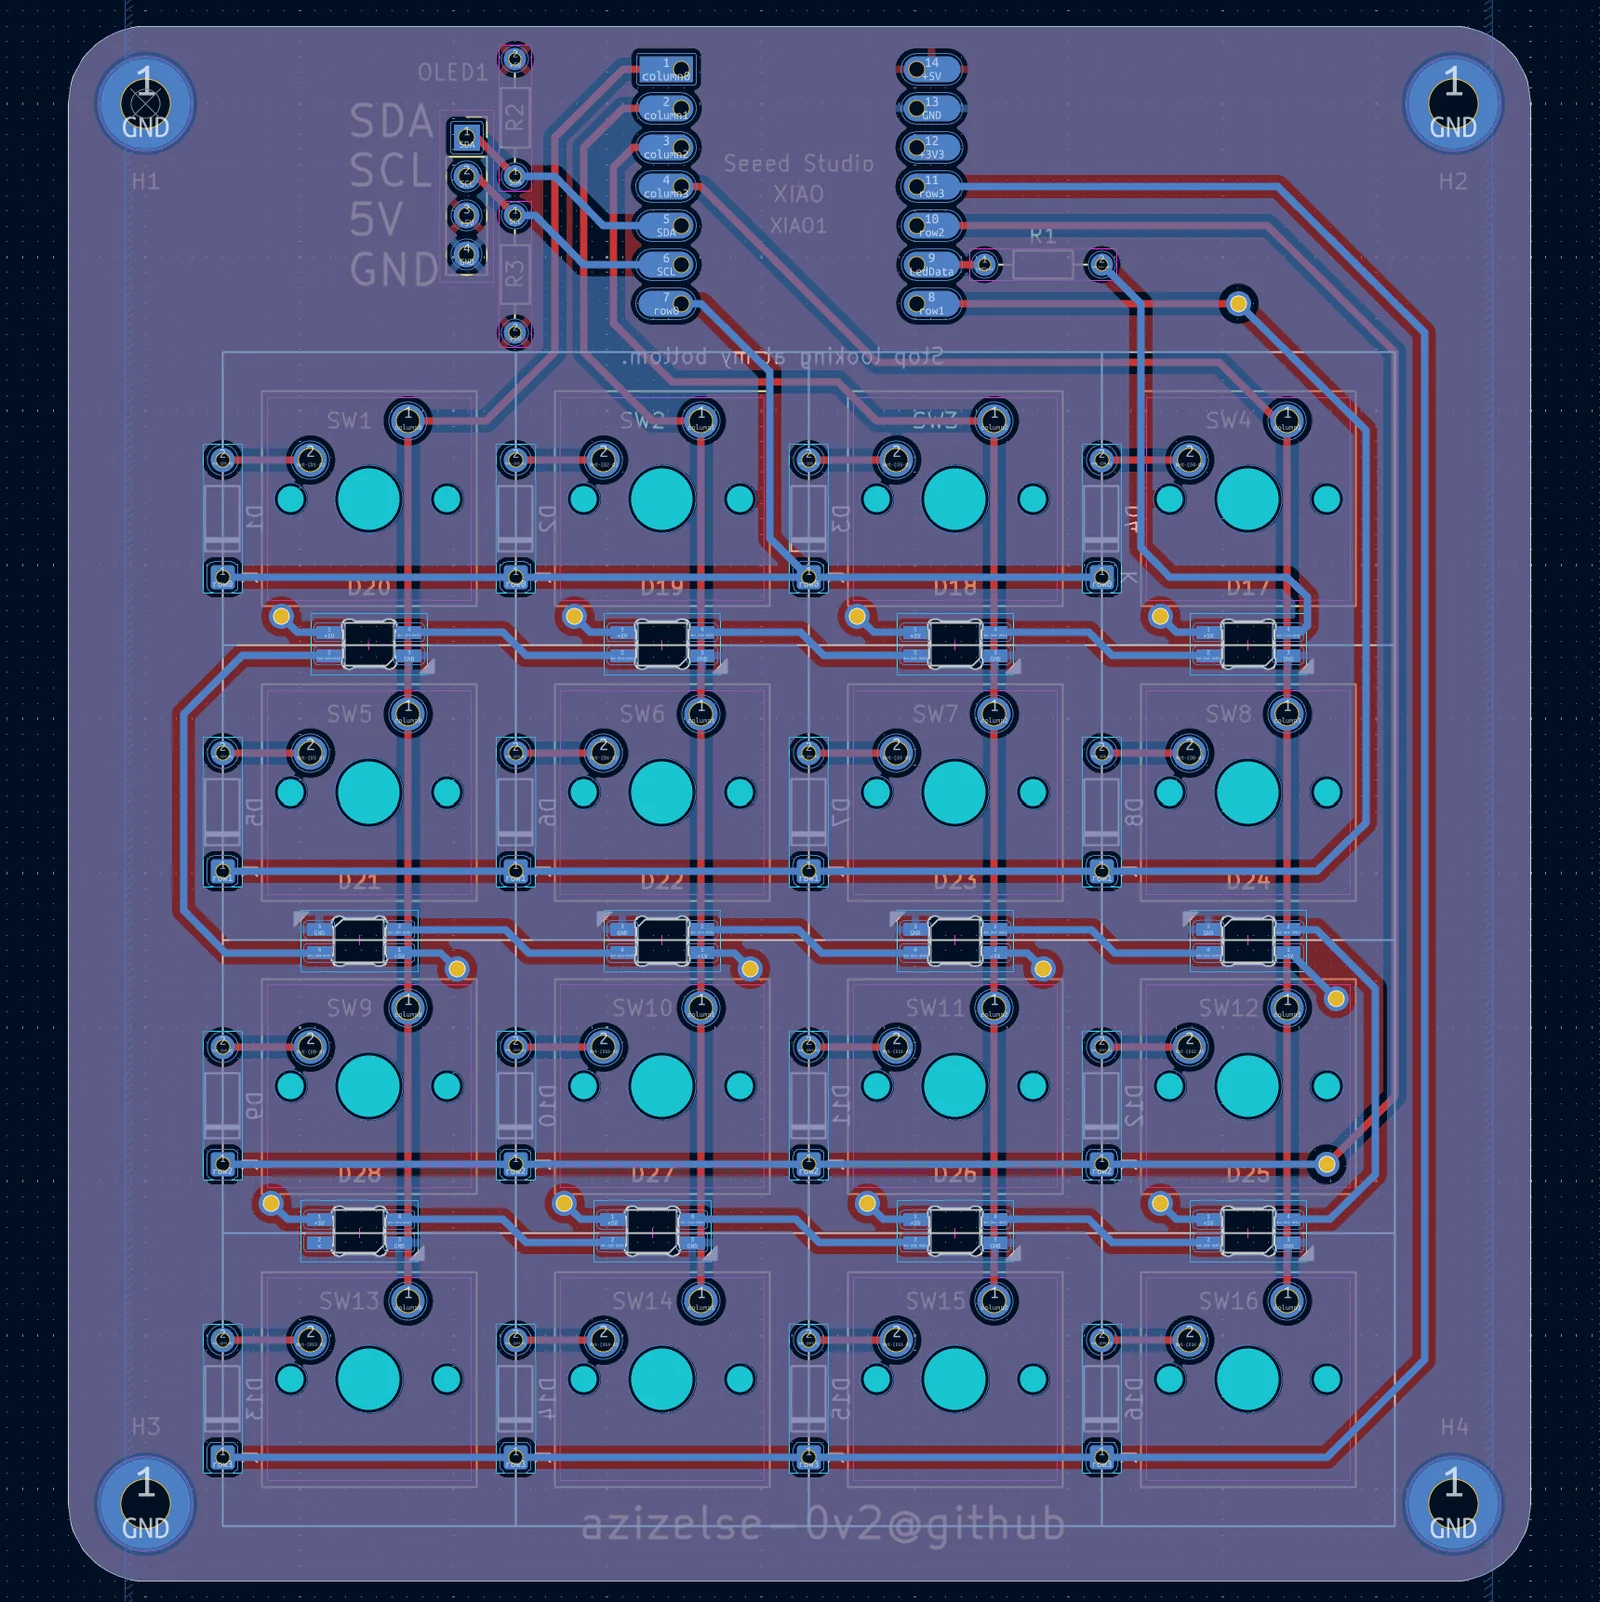
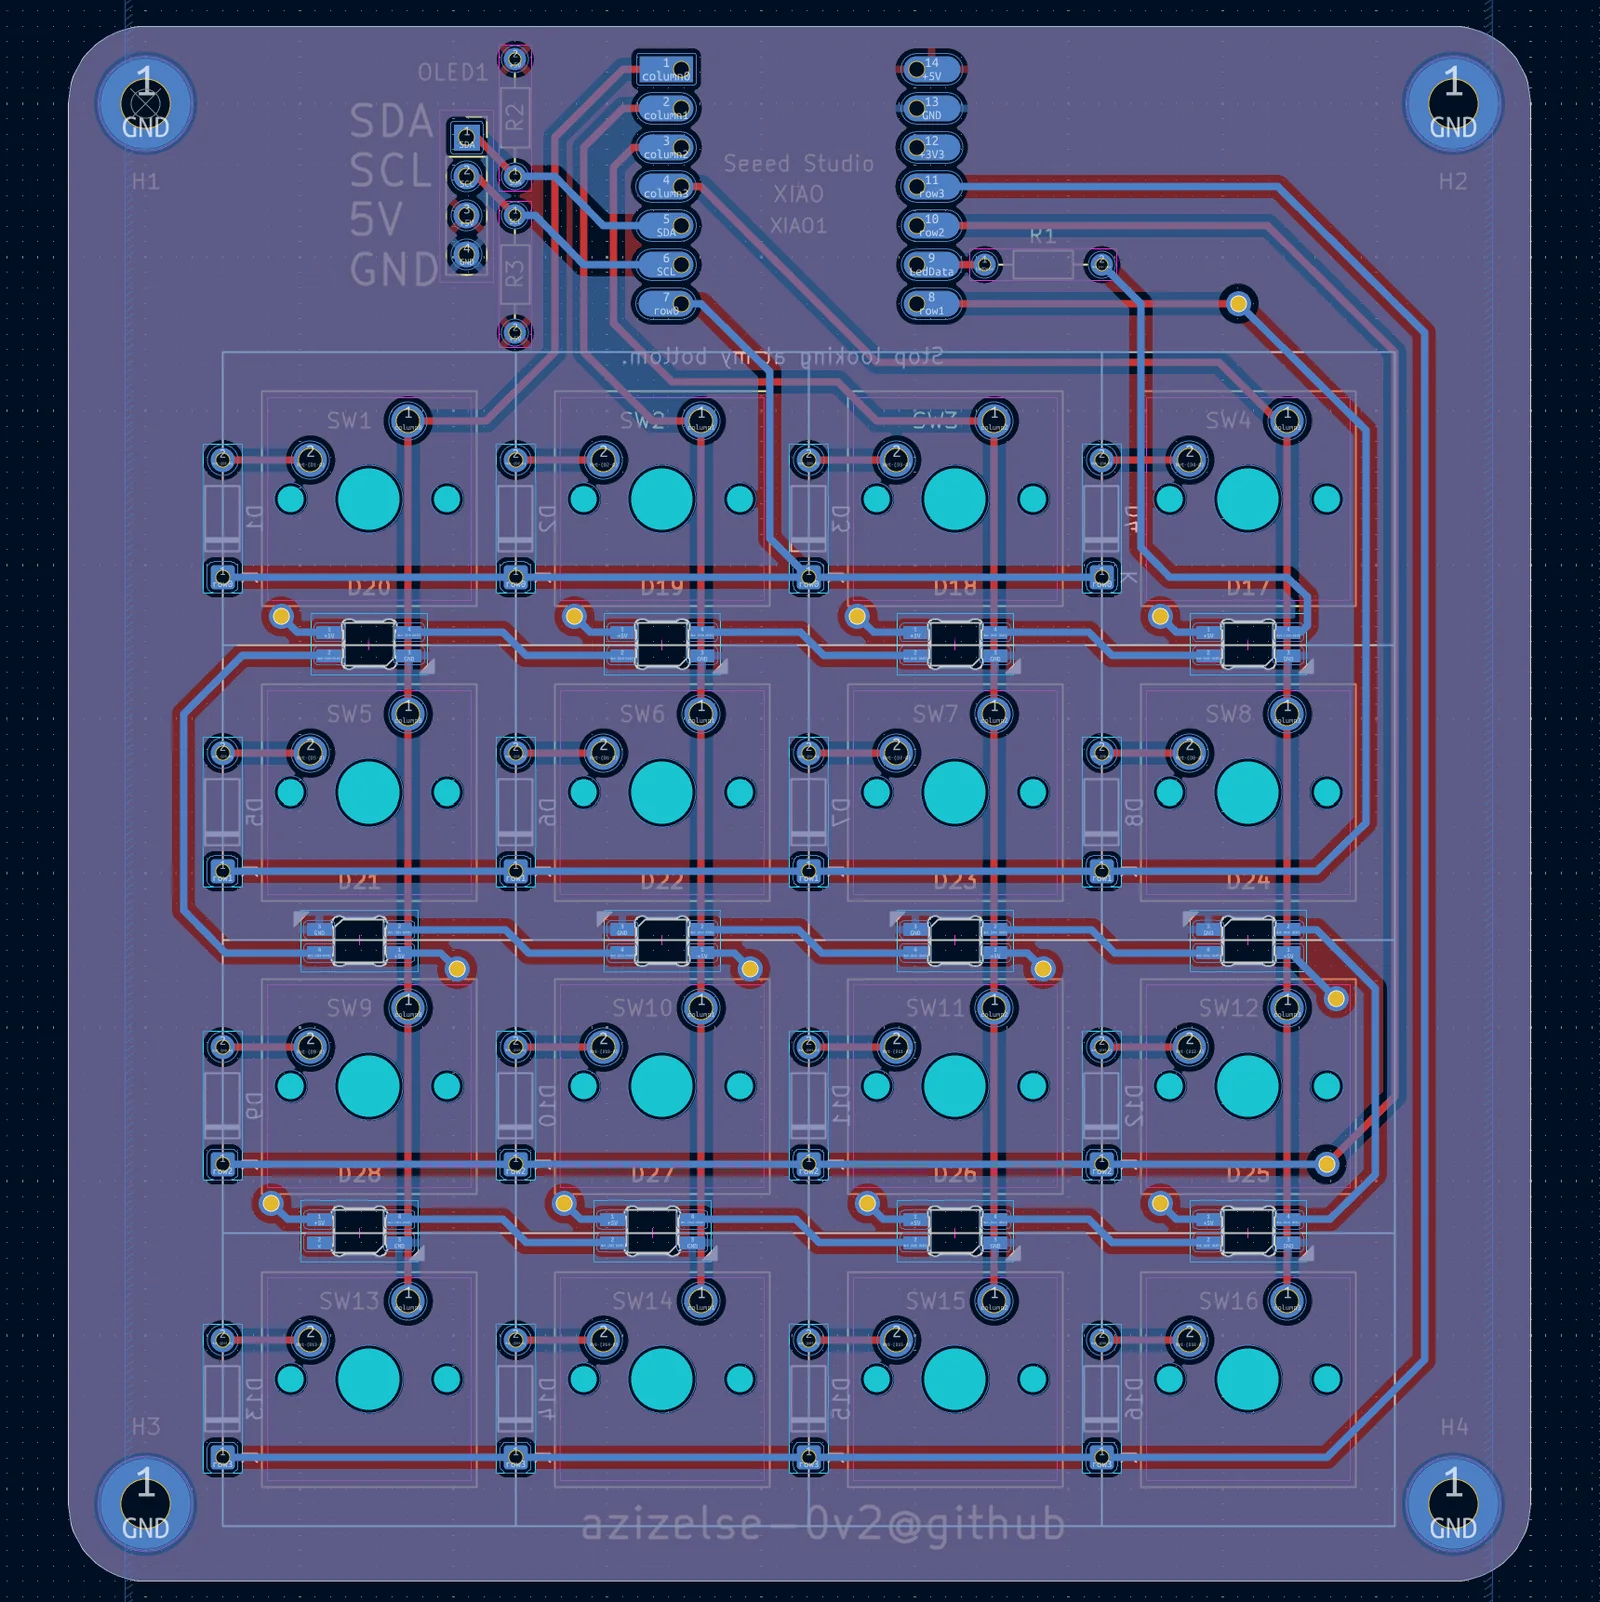
PCB Layout
Case Assembly
Bill of Materials (BOM)
| Part | Quantity | Description | Supplier |
|---|---|---|---|
| Seeed XIAO RP2040 | 1 | RP2040 microcontroller board | Seeed Studio |
| Cherry MX Switch | 16 | Mechanical keyboard switches | Cherry |
| DSA Keycaps | 16 | Cherry MX compatible keycaps | Keycaps Direct |
| 0.96" OLED Display | 1 | SH1106 128x64 I2C OLED | AliExpress |
| SK6812 MINI-E LED | 12 | RGB LEDs | AliExpress |
| Custom PCB | 1 | 2-layer PCB | This project |
| 3D Printed Case | 2 | ABS/PLA case parts | This project |
Project Structure
macro_pad/
├── CAD/                 # 3D models and assembly
│   ├── bottom_part.step # Bottom part of the 3D model
│   ├── top_part.step    # Top part of the 3D model
│   └── Pictures/        # Rendered images
├── PCB/                 # KiCAD design files
│   ├── macro_pad.kicad_pro
│   ├── macro_pad.kicad_sch
│   ├── macro_pad.kicad_pcb
│   └── Pictures/        # PCB images
├── Firmware/            # KMK firmware source
│   ├── main.py
│   └── kmk/             # KMK library
├── Production/          # Manufacturing files
│   ├── gerbers.zip      # PCB gerbers
│   ├── top_part.STL     # Case parts
│   ├── bottom_part.STL
│   └── firmware.uf2     # Compiled firmware
└── README.md
Building the Macro Pad
PCB Manufacturing
- Download
Production/gerbers.zip - Upload to your preferred PCB manufacturer (JLCPCB, PCBWay, etc.)
- Order 2-layer PCBs with standard specifications
Case Printing
- Use the STL files in
Production/for 3D printing - Print with ABS or PLA, 0.2mm layer height recommended
- Assemble with M3 screws
Assembly
- Solder components to the PCB
- Mount switches
- Connect OLED and LEDs
- Place PCB in case and secure
Firmware Flashing
- Install KMK firmware (see Firmware/ directory)
- Put XIAO RP2040 into bootloader mode (double-click reset)
- Drag
firmware.uf2to the RPI-RP2 drive
Customization
The firmware is written in Python using KMK. Edit Firmware/main.py to customize key mappings, LED effects, and display output.
Repository
- GitHub: azizelse/macro_pad
- License: MIT
Acknowledgments
This project is submitted as part of the Hackpad community challenge. Special thanks to the KMK firmware developers and the open-source hardware community.
Built with ❤️ using KiCAD, Fusion 360, and KMK